Monday, December 24, 2012

Happy Holidays and Happy New Year

I wanted to wish you, my readers, a wonderful holiday season and new year.  I so appreciate your following along as I continually do my change ups and design experiments.
 I'm so thankful for all of you who I consider to be my  special e-friends.
 This little blog that I started on a whim made that possible.  Thanks.
  I'll be signing off until the new year.  I'll see you all then.
Happy Holidays to All.

My son, James, and Bella


 Happy Holidays

I'm looking forward to connecting with all of you again next year.

Kathy


Saturday, December 22, 2012

Glitter Deer and Antlers

For our latest sale I decorated a tree with deer ornaments and antlers and wove some upholstery webbing through the branches.


I liked it so much that when the sale was over I decided to bring it home and make it part of my holiday decor.  I replenished the deer population on the tree and
 placed it inside a hunter green chinoiserie planter.  It's perfect on my front porch since our out-of-control deer herds frequent our front yard.


I think it looks just as good on the porch as it did at the store.


I wonder if the deer will notice the next time they're grazing in my front yard.


Kathy


Thursday, December 20, 2012

Holiday Mantel

I'm am so running behind this year.  I just had a chance to finish my mantel in my family room   I'm usually a silver glittery girl, but this year I was inspired by some modern geometric brass mirrors.  You know I love geometrics.   So, I decided I'd go for the gold instead.  

I think the photos explain it all.  Enjoy.

Family Room Mantel


Are you gold or silver this year?

To see my Christmas tree, go here.

Kathy


Wednesday, December 19, 2012

My Holiday Tree

Every year I try to find something to inspire my tree decor.  This year I fell in love with some wide leopard print ribbon and I was off and running.  I repeated the coppery brown and shimmering gold in the ribbon with copper and gold ornaments.  I also had some small mirrors in gold frames, some leopard pillow ornaments and cone baskets, some gold architectural castings, some mini leopard shade ornaments, and some beaded acorns that I sprinkled around.   Before I share the whole tree, here are some close ups of the ornaments.  Notice that I wove the ribbon vertically on the tree rather than wrapping it around the branches.


In lieu of a purchased tree skirt I retrieved a vintage leopard coat from the closet and wrapped it around the base.


I'm also pretty tired of wrapping garland around my stair railing.  I was going to hang wreaths instead, but changed my mind.  Lately I've been using empty frames or empty frames within frames in my decor. I decided to decorate the stairs with some vintage frames.   I dangled interesting gold frames from my stair railing with more leopard ribbon.  Magnolia branches within the frame add the holiday touch.


On the landing I added some sparkle to my shabby oil painting with a copper beaded garland.  One of my favorite vintage purchases is a French copper lined demi-john.  I added more magnolia branches.  The Santos angel with copper wings is perfect in the vignette.

 
My Foyer


My 2012 Tree


My leopard chairs and copper sequined pillows even cooperated with the decor.


So are you an animal print fan?

To see my 2013 peacock feather inspired tree, go here.

My 2013 Christmas Tree


Kathy


Thursday, December 13, 2012

My Sphere Is Back for the Holidays

Well my Fall sphere asked to be changed out for Christmas and I obliged.
If you missed that post go here.
First step was to strip her down to her burlap skirt.


I wanted to create a base with evergreen cuttings, magnolia leaves. and a mound of orbs.   Initially I purchased these over-sized orbs.  I thought they were so nice with the marbleizing.  But, when I looked at them again they looked like bowling balls.  Yuck.
My Bowling Ball Sphere


Time to grab some metallic spray paint.  My hint for painting orbs is to suspend them in tree branches with a wire coat hanger and paper clip.  Very easy to paint.

My spheres ready for their transformation from bowling ball to silver orb.

They're much better silver.

I placed evergreen cuttings and magnolia branches in the base of the sphere.  I added silver spheres in all sizes and textures on top.  Hint:  I built up the sides with the cuttings to keep the spheres from rolling out.  Here is my holiday display in my tall planter.


Take a closer look.


So, what have you been up to for holiday decor?

Kathy


Friday, December 7, 2012

My Almost Free Fresh Wreath

Making fresh wreaths as holiday gifts has become a tradition with me.  It's super easy and the greenery is free.  That's the best part.

My only purchase is a wire wreath frame and some florist's wire.   Both are available at local craft stores.   You'll also need some garden clippers and some evergreen clippings.  You can get these free where ever Christmas trees are being sold.  Most places have a bin with discarded trimmings.


The first thing I do is attach the end of the floral wire on to the wreath form.  I put it on an inside ring.  You can start anywhere.


I lay some of the clippings onto the wreath.  If possible, I tuck a stem under one of the wires. Begin wrapping the floral wire over the stems, under the wreath and over some stems again.  I work my way over and under all the way around the wreath, overlapping the evergreen branches and pulling the wire tightly around the greens and wreath.


This is what it looks like when I've made it all the way around and pulled tightly.

Wreath after first time around.

I then go around one more time, adding more clippings.  This second time I make it a little less tight.  
Don't catch all the stems this time and it will make the wreath fuller with some loose branches.
Wreath after second time around with loose branches.
Next, flip over to the back side and cut the floral wire, allowing enough to tie off the end.  Attach the end of the floral wire to the underside of the frame.

Underside of wreath.  Attach the end of the floral wire.

Now, most people would stop here, add a ribbon and some other holiday decor and call it a day.  Not me though.  I like to find cuttings in my garden and add them too.   My favorite plants are my Nandinas.  They come in shrub form and tree-like.  In the next image the Nandia shrubs are in the foreground and the other tall tree Nandina flank my chimney.  

My Nandina in the foreground and along the chimney.


I love both kinds of Nandina.  I love the shrub for its change from green to a fiery red in the winter.

Nandina shrub with tinges of red.


I love the tree-like Nandina for its winter berries.  

Nandina with its winter berries along my chimney.

I also like to use magnolia.  I wish I had one in my yard but I'm lucky enough to have a neighbor who always shares.   After I've assembled all the garden clippings, I attach them to the wreath with the same floral wire.  You can wrap the wire around one of your clippings and attach it to a branch or wire in the wreath, or loop the floral wire under a branch on the wreath, lay the cutting on top and attach that way.  Sometimes with larger clippings you may have to attach in two places.

Adding cuttings to your wreath with floral wire.

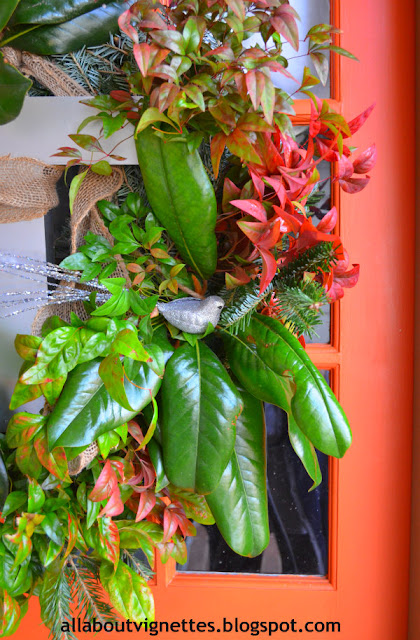
Besides the cuttings, I added some burlap ribbon to the wreath, a bird ornament, and since my family member's last name ends in T,  I added a vintage signage letter to the wreath.  Here it is in its temporary spot on my front door.

My completed wreath temporarily on my front door.


Gotta love the bird.


I think my family must like them because they always return the wire frame after the holidays so I'll have it for next year's wreath.  LOL

FYI, if you don't mind spending $6.99, you can purchase a plain wreath at Trader Joe's and just add ribbon and garden clippings to the already-made wreath.  I'll stick with my way.  I enjoy making them and coming up with different wreaths and colors each year.

Let me know if you try it.  I'd love to see your wreath.

Kathy