Sunday, February 24, 2013

Re-Visiting Urns and Trophies

I've been blogging for a little over two years.  With some trepidation I decided to go back and look at some of my really early blog posts.  As I went back I'll have to say that I was approaching them with what a relative describes as using my "long teeth".  Part of me wanted to see what I'd been up to then and part of me was leery of what I might see.  What I found was that they weren't that bad.  It was actually an eye opener to how many changes I had made to my home in that short time.  And, how many pieces had moved around the house.  I have to say that the photos taken with my point and shoot camera and without the benefit of a photo editing program in place weren't that bad.  Whew!!!!!!


One of the many change-ups was my step back cupboard in my kitchen.  Today it looks like this. 

Styled Bookcase

In the earlier post it had a red background and was filled with my collection of trophies and urns.  Looking back, that red was sooooo harsh.  To see how I transformed and re-styled it go here.


To see the original post about the trophies --cringe--go here.


Even though the trophies and urns don't fill my cabinet any more, I still use urns and trophies in my home. 

During the holidays I use them to hold flatware for a buffet.


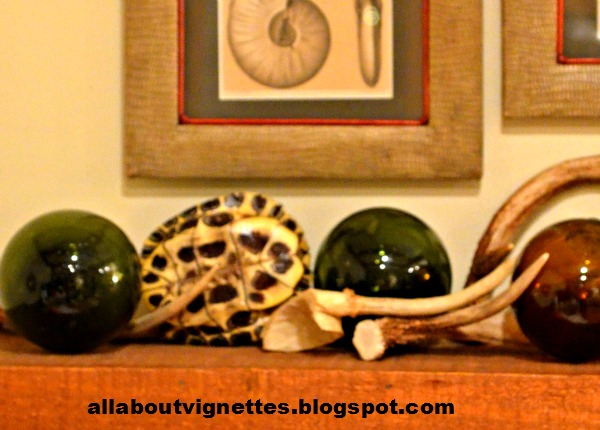
They support some globes on my bedroom dresser.


I love using feathers in containers. This is one of my larger trophies.
It's dated 1926 and is for the President's Club, Washington County, PA.


I even converted a coffee urn into a lamp.  It's in my laundry room on my pantry shelf now but used to be in the kitchen.


I found these super fun flatware with leopard print handles.
 I store them in urns on my kitchen counter within easy reach.   In front of the pewter plate is a Pairpoint urn filled with pears.
 If you missed my post about my faux snakeskin back splash with nail head trim, go here


These urns are also in my kitchen.  They're new and have a flat back, almost like a wall pocket.  They're from one of my wholesale suppliers, Go Home Ltd.  I filled the tops with moss.


This small urn displays the hornet's nest I found.


I also have a large urn in my laundry/pantry.  I sometimes put a silver sphere in it or as in this image my freeze-dried boxwood orb rests in it.


I think I may be taking a peek at some of my other early posts.  Who knows what I'll find.
Have any of my blogger readers gone back to the very beginning?  What have you found?


Kathy


Wednesday, February 20, 2013

How to Reupholster a Simple Chair Seat

If you haven't tried it yet, it's pretty easy to recover a chair seat that is only held on to the chair with four screws.  Since I'm currently working on a vanity seat, I'll use that in the tutorial.  There's no difference from working on a chair seat or vanity seat.  It's the same process.

This is what I started out with--a simple vanity seat with some toile fabric.  


The first step is to turn the bench over onto a flat surface.  I used my dining room table. (Yes that's an animal hide rug draped over my table.)  Remove the four screws and the seat cushion will lift off.

Four Screws in the Corners Holding the Seat in Place

Put the base aside and put the screws in a safe place, then begin to remove the staples that are holding  the fabric and the seat in place.  I use an old screwdriver to get under and lift up the staples.  If the staple doesn't come out easily, I remove it with my needle nose pliers.  


Removing the staples can be time consuming.  Many times you find more layers of fabric under the first one.  On this bench I found three different fabrics.  This little bench had been re-covered three times.   If you want a nice professional result you must remove all the layers.  To me, it's interesting to see fabric choices from different times.  I can sometimes guess from the fabric style when it was done.

The two layers I found under the original fabric.
After the fabric is removed, the batting (what offers padding to the seat) remains.  This is an older bench because the seat padding is made of cotton batting.  Sometimes, if the piece is really old, you'll find horse hair filling.

Old Cotton Batting

This batting is in good condition so I will leave it in place.  If your batting is lumpy, torn, or stained, I advise removing it.  If you remove the batting you should replace it with a thin piece of foam before you do the next step.  You can use some spray adhesive to attach the foam to the seat.  This will keep it from moving around when someone sits on it.   I'm going to use new polyester batting on top of the cotton.  If you added foam, just put the batting over the foam.   This new batting is stronger and provides a smoother surface than the old cotton batting.  I always use quilt batting on a roll and cut it to fit the size of my seat. Make sure you allow for some of the batting to go around the edge of the seat.  This will pad the edge.  I purchase the large roll of batting for a queen size quilt, but if you don't have many seats to do you could buy the crib size batting.  I like to use this instead of the regular fiber fill because it is a continuous piece and doesn't clump and lump.

Polyester Batting

I selected a black and white damask fabric for my bench.  If your fabric has a pattern, make sure you center the design before you cut it out.  I usually lay my fabric on top of the seat and use the seat as my pattern.  If you don't feel comfortable free handing it, make a pattern.    Add at least two inches more to your pattern.  You need enough to fold under and staple.
To ensure that your fabric stays centered,  place your first staple in the center of one of the four sides, next place a staple in the center of the opposite side, then staple in the centers of the remaining two sides.   You can then continue stapling around the perimeter.


It's important to have a smooth corner with no creases.  If you're having trouble doing the corner, visit Little Green Notebook.  She illustrates it soooo much better than I can.

 How to get a smooth seat corner via Little Green Notebook.
(Click on the image or highlighted words to see the whole tutorial.)

I decided to add cording to my bench.  Usually I make my own bias cording, but this time I decided to use this pre-made trim.  You can see my stapled-on fabric and then the cording on top of that in the next image.  It's a two step process.
(If you're interested in making your own matching cording go here for my tutorial.)


Join the two ends together by making an x with the trim ends and staple in place to finish it off.  This will blend the two ends and there won't be a noticeable start/stop.  You could also unwind the twisted cording and intertwine the two ends, then staple in place.


I always like to make the underside as pretty as the top, so I cut some fabric to size and just staple it in place.  I used some black burlap for this project.  Muslin works well too.  I just make the piece a little larger than the space and press the rough edges under before I staple it in place.


The last step is to re-attach the seat to the base.  Sometimes it's hard to get the screws into the holes because they sometimes get stuck in the fabric.  Just apply a little pressure and it will work.


All done.  Yea.


It's a pretty easy fix for a chair with dated fabric.  My advice is that if you plan on doing this again, you should invest in an electric staple gun.  It will make your job so much easier.

Make sure you visit my previous tutorial on how to make matching bias cording here.


 Bias Cording


Let me know how your project works out.

Kathy

Post Teaser 
If you love urns and trophies stop back on Sunday.  
.

Wednesday, February 13, 2013

My Awesome Dad

I just wrote a post about my 90-year-old Mother and now it's time to share about my equally-talented Dad. He's 90 too!!!! My Dad can build or create or fix just about anything.  He's built houses as well as banks.  He makes kitchen cabinets, which is an accomplishment in itself, but, he goes a step farther and buys the just-harvested wood, cures it, planes it, and then makes the cabinets. 
He's helped all eight of his children with all of their home projects. He's put trim moulding throughout one of my houses, helped me with endless furniture repairs, and I think my favorite project he completed for me is my mailbox and matching lamp post.   I brought him a picture and he created exactly what I wanted.  I think of him every time I pull into my driveway.

My Mailbox and Matching Lamp Post Created by My Dad

Close-up of the Lamp Post
And, the best part ever is that my youngest son, James, and my Dad
 were both born on November 6th.

They always have a joint birthday celebration.  There's some confusion on the part of the cashier when I say I'm buying numbers for a birthday cake and I buy three.  On that first birthday cake for my son and my Dad, the candles read 761!!!!

My Awesome Dad and My Son at One of Their Joint Birthday Parties

I guess I'm pretty lucky to have such great talented parents.

Kathy

If you missed my post about my Mom, go here

I couldn't resist sharing this.  James decided that Bella needed a sweatshirt.


Post Teaser
Bar carts are trending, but your bar cart doesn't have to be brass with a tray.  Some out-of-the-box carts are fun too.  I'll be posting some creative bar cart alternatives on Sunday evening.
 Please check back.


Sunday, February 10, 2013

Spunky Inspiration

My sister just wrote a blog post about our Mom and she inspired me to do the same.
Our Mom just turned 90 and she's been my spunky inspiration my whole life.  She's the mother of eight, and mixed in with all the lunch packing, the laundry, and the cooking she always managed to fit in some  creativity.  I remember her making a huge chalkboard wall for us, painting designs on furniture, and yes, she was the source of my vintage addiction.   I remember attending auctions, flea markets, and estate sales with her.  In fact, we still shop together.  I have to say that she still finds the most awesome vintage for me.  Finds in Western Pennsylvania are much more interesting and much better priced than here in the DC area.  She has a great eye and is my muse.

Mom at Her Surprise Birthday Party


My Mom Loves Hydrangeas
 As I said, she is the mother of eight, but she's also grandmother to fifteen and
great-grandmother to three.

 She's always busy and we've named her the energizer bunny.


Kathy


She'll be visiting this weekend.  I can't wait to hang out with her.


Post Teaser
Check back on Wednesday evening when I'll be posting about my equally awesome
 90-year-young Dad.

If you love to read, you must check out my sister's blog, Silver's Reviews, too, here.


Wednesday, February 6, 2013

Vignette Fragments on My Nature-Inspired Mantel

Yes, I'm back to that family room mantel that I never seem to get quite right.  I have to say though that while it gives me fits, it also pushes to me tackle it one more time.  It remained empty after Christmas, but I seemed to have accumulated quite a few nature-related items
 and started playing with them until I came up with this.
It's a mix of antlers, turtle shells, glass floats from Pottery Barn,
 and framed book plates, with some covered demijohns, vintage books,
and an iron grate for a back drop.


I decided that I like to photograph snippets of arrangements.  This mantel was no exception.

Enjoy my vignette fragments.


Do you like to use nature in your decor?

Kathy


Pin It